Equipment, Rarity and the Blacksmith: Upgrading, Rerolling and Salvage
How gear works in Rogue Blight — armor slots, rarity tiers and legendary perks, upgrading with salvage at the blacksmith, and when to reroll instead.
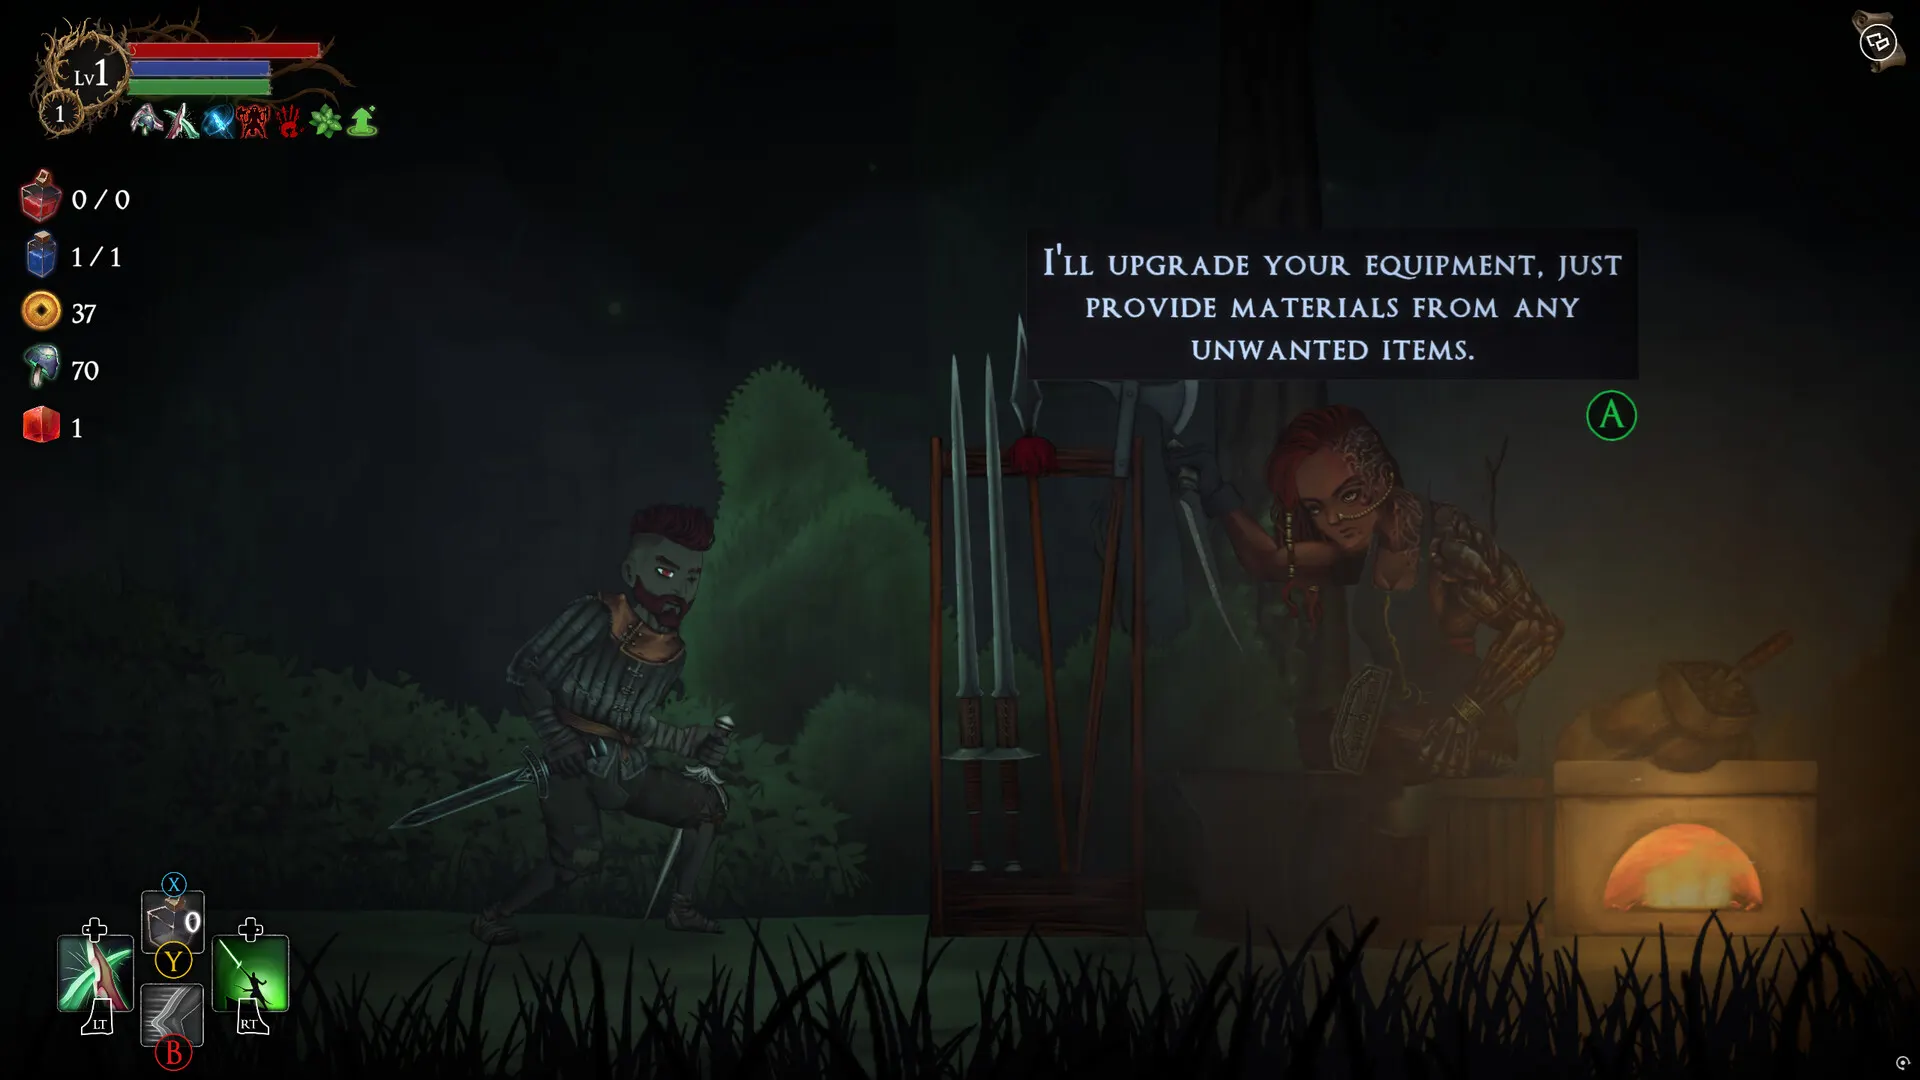
Loot is how Rogue Blight talks to you — every drop is a stat line, a scaling color, sometimes a whole build proposal. This page is the reference for the gear system itself: what you can wear, how rarity works, and how to feed the blacksmith.
The slots
The equipment screen shows four weapon slots (Right Hand 1–2, Left Hand 1–2) and five armor slots:
- Head — helmets, hoods, masks, and special cases like the Mimic Head.
- Chest — your Defense backbone.
- Hands — gloves often carry utility perks (documented legendary gloves grant a second aerial attack).
- Legs & Boots — stamina, dexterity and mobility lines cluster here.
- Off-hand extras — shields, torches (a light source that rolls stats), and once unlocked, a second weapon for dual wield.
What the defense stats mean
| Line | Effect |
|---|---|
| Def | Flat physical damage reduction; Strength adds a Bonus Defense layer on top. |
| Poise | Stagger resistance — how much punishment you eat before your own swing stalls. |
| Elemental Resist | Cuts fire, ice, lightning and similar damage. |
| Status Resist | Reduces your odds of suffering Burn, Bleed, Poison, Freeze and friends. |
Rarity and perks
- Common through epic pieces roll plain stat lines with better totals at higher rarity.
- Legendary items (yellow text) carry a unique perk — the game treats these as build anchors. One legendary is confirmed in the official UI: Ilidrake’s Helmet (DEF +1), whose perk reads “Aerial weapon attacks deal additional 10% damage. (Bonus is kept even if unequipped.)” — direct confirmation that some legendary bonuses persist while the item sits in your bag.
- Other documented legendaries from launch footage: aerial-attack gloves, a burn-damage doubler, a Gold Steal armor piece, and the Mimic Head.
- Legendary find chance is its own stat and hub upgrade; early on, don’t chase it — it finds you.
The blacksmith: upgrade, reroll, salvage
The blacksmith node (hammer icon) is the gear system’s engine room. His opening line says the model outright: “I’ll upgrade your equipment, just provide materials from any unwanted items.”
Upgrading
- Feed him unwanted gear as material — every piece salvages into upgrade fuel.
- Choose the piece to improve; your main weapon first, always. Upgrades raise damage ranges, defense values, and often status chances.
- Upgrades have visible level caps per visit tier; the blacksmith points hub upgrade (+5 refine points) extends what he can do per encounter.
Rerolling
At higher blacksmith tiers, a reroll option replaces a piece’s stat lines with new ones. Players use it two ways: fixing a great unique perk stuck on bad stats, or pushing already-strong gear toward perfect lines. Reroll pricing scales with the piece — screenshot your before/after; the community is still mapping good targets.
Salvage discipline
- Never sell before the blacksmith — unwanted gear is worth more as upgrade material than as gold.
- Salvage your replaced weapon immediately after equipping an upgrade; inventories don’t survive runs.
- Elementally-unique weapons (Flame, Frost, Water) are often worth keeping as a second slot even at lower numbers — their status effects don’t scale purely off damage.
A simple priority order
- Main weapon to the highest upgrade you can afford — it multiplies everything.
- Chest or shield — defense is the run-lengthener.
- Boots/gloves with utility lines (stamina, status application).
- Rerolls once a piece’s perk matters more than its numbers — usually from the second blacksmith visit onward.
Keep reading
- Rogue Blight Weapons Guide: Every Confirmed Weapon, Skills and ScalingAll weapons documented in Rogue Blight so far — swords, daggers, wands, bows and their skills — plus how weapon scaling, rarity and upgrading work. Read guide
- Rogue Blight Stats Explained: Strength, Intelligence, Dexterity, PoiseWhat every stat in Rogue Blight actually does — Strength, Intelligence, Dexterity, Defense, Poise and resistances — with the exact effects shown in-game. Read guide
- Rogue Blight Dual Wield: Rules, the 40% Penalty and When It's Worth ItHow dual wield works in Rogue Blight — two swords, daggers or wands attack simultaneously but each deals 40% less damage and applies status 40% slower. Read guide
- Rogue Blight Boss Essence: What It Is and How to Turn It Into Boss ArmorWhere Boss Essence drops in Rogue Blight, how the blacksmith turns it into boss armor, and why boss trophies like the Gorilla Skull are permanent account power. Read guide
- Rogue Blight Meta Upgrades: Every Permanent Upgrade and What to Buy FirstThe full hub upgrade list in Rogue Blight — max HP, weapon slots, bonfire potion refills, gold recovery, shop stock, blacksmith points — with a buy order that works. Read guide