Rogue Blight Beginner's Guide: Surviving Your First Runs
Everything a new Rogue Blight player needs: how a run works, what death costs, which upgrades to buy first, and the mistakes that end most first runs.
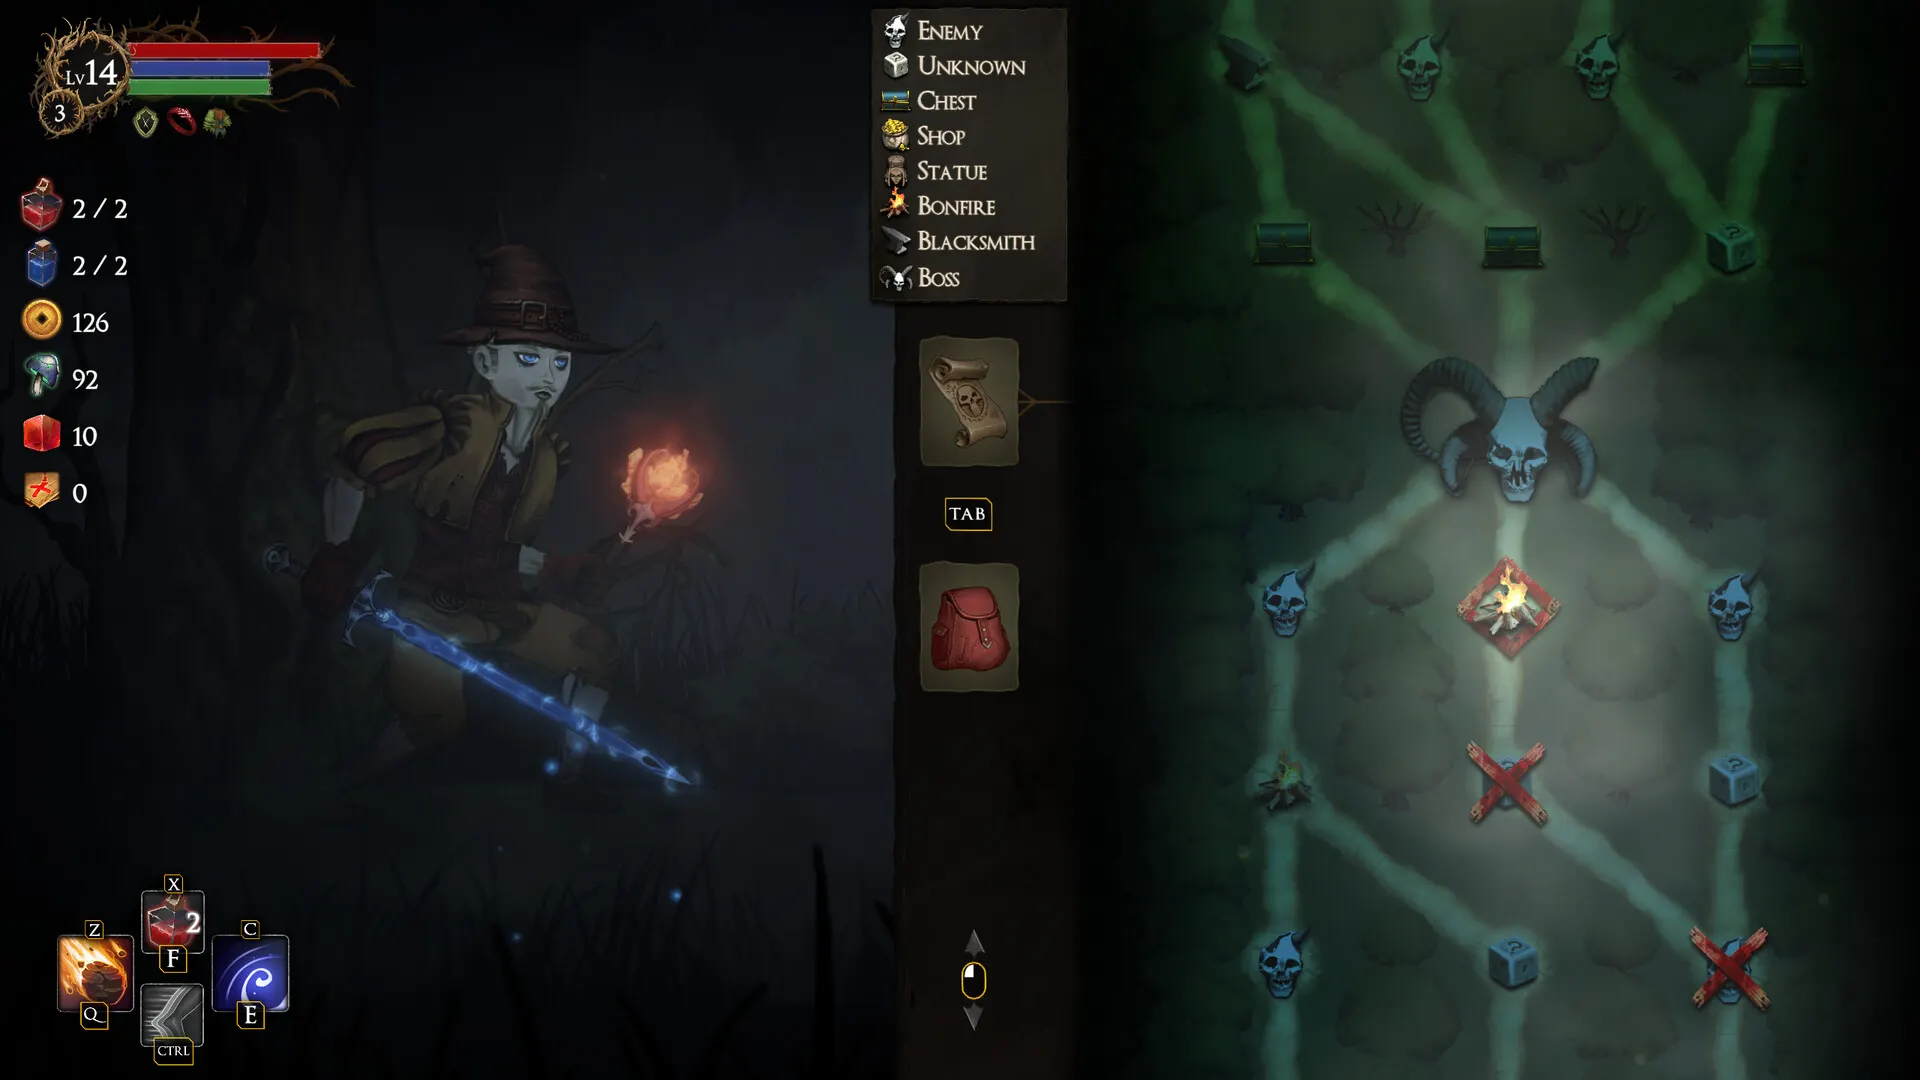
Rogue Blight throws two systems at you at once — a souls-like side-scroller where positioning and stamina matter, and a Slay-the-Spire-style map where every step is a choice. This guide explains how a run actually fits together, what you lose when you die, and the order we’d buy hub upgrades in during your first evenings.
How a run works, start to finish
Every run has the same skeleton:
- Pick a map. From the map maker you choose between Story Mode and Challenge Maps. Story Mode is the handcrafted progression most players should start with.
- Fight through nodes. The map is a branching trail of nodes: Enemy fights, Chests, Unknown encounters, Shops, Statues, Bonfires, a Blacksmith, and a Boss. You can usually see the next two or three node types before you commit.
- Grow inside the run. Battles and chests drop weapons and armor, gold buys shop items and Blessings, and Fungi feed special trades. Your character also levels up mid-run.
- Kill the floor boss to descend. Each floor ends with a boss behind a Boss node. Multiple players report at least three floors plus a final encounter in Story Mode.
- Die or finish — either way, you bank progress. Meta upgrades bought in the hub survive death. Run gear does not.
What death actually costs
Death ends the run. The exact penalty differs from most roguelikes in two ways worth knowing early:
- You keep everything bought at the hub — permanent stat upgrades, unlocked potion types, extra weapon slots, shop stock, bonfire improvements, and similar meta upgrades.
- Gold from the run is normally lost. There is a hub upgrade line that lets you recover part of your gold between runs; several players treat it as a mid-priority purchase rather than a first one, because gold inside a run is usually spent quickly anyway.
So a “failed” run that reached the second boss still moved your account forward. That’s the mindset: early runs are shopping trips.
Your first five minutes, step by step
- Pick your starting kit. You begin with a basic sword; a wooden wand start is also available once unlocked. Sword is the safer tutorial — wand plays around mana.
- Read the controls screen. Defaults: move with A/D, attack with the mouse (aim sets your swing direction), right-click to block if you carry a shield, Ctrl dashes (dash grants invincibility frames), Space jumps, Q uses your left-hand weapon’s skill, Tab opens the map and bag. Everything is rebindable, and full controller support is confirmed.
- Take the first fight slowly. Enemies telegraph; dash through attacks rather than away from them — the i-frames do the work. Multiple players describe the dash as the single most important habit.
- Spend gold at the first shop on a Blessing if one is offered. Blessings are run-defining buffs; gold left unspent is wasted when you die.
- Rest at every Bonfire you pass. Bonfires restore HP and mana; a hub upgrade later also refills your potions there.
Which hub upgrades to buy first
The hub NPC sells permanent upgrades using a shared currency you earn from runs. The list is long, but the first few purchases are nearly universal:
| Order | Upgrade | Why first |
|---|---|---|
| 1 | Max HP increases | Every build benefits; the game is punishing and HP is the shared bottleneck. |
| 2 | Base stat increases | Small permanent Strength/Intelligence/Dexterity that make every future weapon feel better. |
| 3 | Left-hand weapon slot | Unlocks dual wield and shield-in-offhand play; huge build flexibility. |
| 4 | Bonfire upgrade (potion refill) | Turns every campfire into a full pit stop; dramatically deepens runs. |
| 5 | Health/Mana potion unlocks | More potion charges per run. |
| 6 | Gold recovery | Softens death; more valuable once your runs regularly earn 150+ gold. |
Several players specifically recommend leaving “legendary drop chance” and shop-stock upgrades until your runs regularly reach the second floor — those upgrades pay off more once you survive long enough to shop twice.
The three mistakes that end most first runs
- Shield-less into a new boss. Blocking with a shield (right-click) staggers attackers when you parry well, and one early shield basically removes the first boss’s corner cases. If a shop sells one, buy it.
- Hoarding potions for “the real fight”. The real fight is the next screen. Drink at half health, not at the grave.
- Dual wielding too early. Two weapons look great, but dual wield cuts each weapon’s damage and status buildup by roughly 40% (it’s in the game’s own tutorial dialog). Until your gear out-levels the floor, sword-and-shield deals more real damage. Our Dual Wield guide covers when the trade flips.
What to unlock next
Once your first run ends — win or lose — the loop is: check the hub upgrades, buy the next one or two, and start a fresh map. When you clear the Wendigo, the game quietly opens up: players consistently report an expanded loot pool and a new, harder map tier unlocking, which is the start of the game’s New Game Plus-style loop (see Map Difficulty).
From here, the fastest paths forward are our Combat Basics, the Builds overview to pick a direction, and the Build Finder if you’d rather answer three questions and get pointed somewhere.
Keep reading
- Combat Basics: Dash I-Frames, Blocking, Parrying and StaminaHow Rogue Blight's souls-like combat actually works: dash invincibility, aimed swings, shield blocking and parrying, aerial attacks, and stamina rules. Read guide
- Rogue Blight Meta Upgrades: Every Permanent Upgrade and What to Buy FirstThe full hub upgrade list in Rogue Blight — max HP, weapon slots, bonfire potion refills, gold recovery, shop stock, blacksmith points — with a buy order that works. Read guide
- Rogue Blight Map Nodes and Random Events: Every Node Type ExplainedThe eight map node types in Rogue Blight — Enemy, Unknown, Chest, Shop, Statue, Bonfire, Blacksmith, Boss — plus random events, steal chances and every NPC. Read guide
- Rogue Blight Builds: Five Archetypes and How to Choose YoursHow builds actually work in Rogue Blight — stat scaling, status engines, off-hand choices — plus our five documented builds from Strength-crit to double Flame Sword. Read guide
- Rogue Blight FAQ: 20 Quick Answers (Price, Co-op, Death, Builds)Quick answers about Rogue Blight — price, platforms, co-op, death penalties, dual wield, fungi, the Wendigo unlock, difficulty tiers and more, all verified. Read guide