Rogue Blight Blessings Guide: How to Get Them and Every Confirmed Blessing
How blessings work in Rogue Blight — where to get them, rerolling, and every blessing documented so far, from Nomsa's Fury to the fear-scream stun.
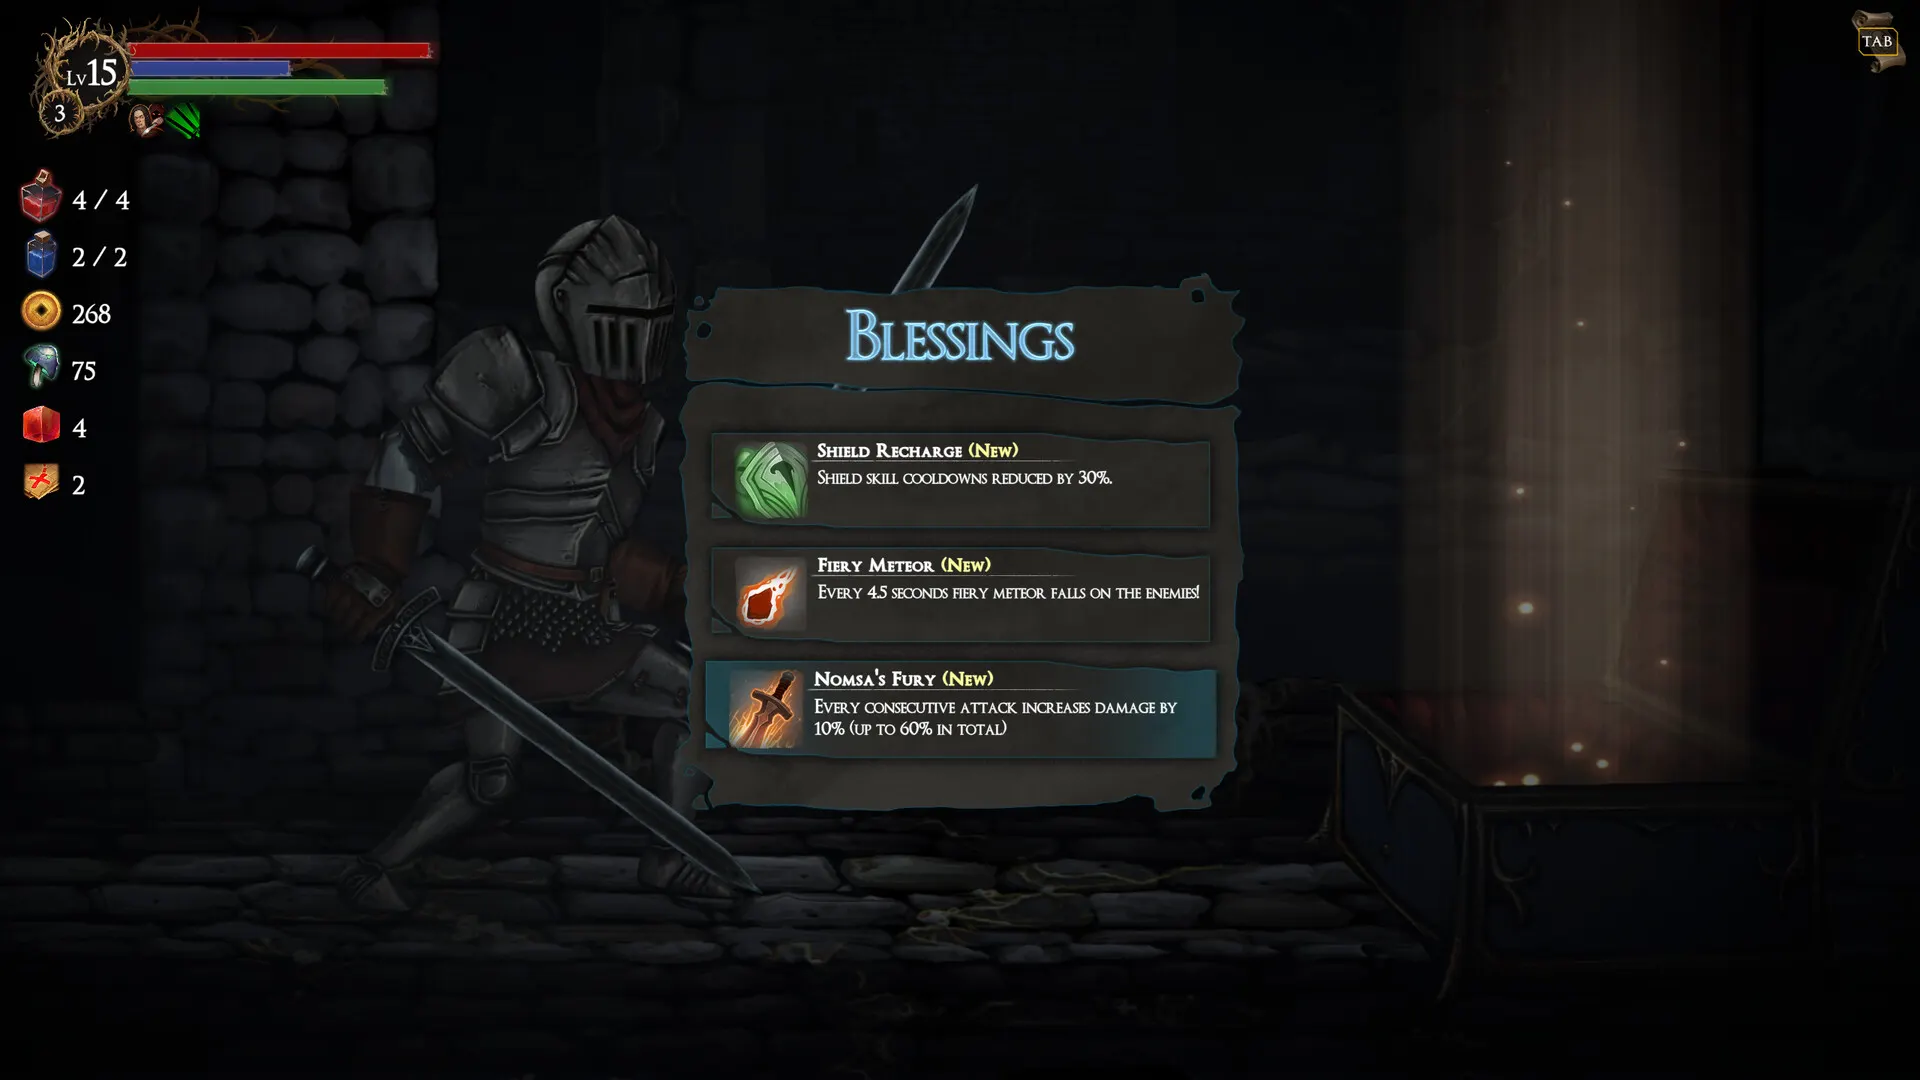
Blessings are why two runs with the same weapon feel nothing alike. They’re passive effects — damage amps, automatic meteors, cooldown cuts, emergency stuns — and the game hands them out generously if you spend on them. This page covers how to acquire them and everything documented so far, with our usual honesty about sources.
How to get blessings
- Blessing nodes. Dedicated map nodes present a choice of three blessings (the selection screen shows each with a “(New)” tag on first pick).
- Shops. Shopkeepers sell blessings for gold. Multiple players call this the single best use of gold — one recommended “depositing money for a blessing” as the default purchase.
- The mushroom trader. An NPC who asks for 5 Fungi and grants a random blessing in return — the main early use for the Fungi currency.
- Event rewards. Some NPC encounters (a sacrifice-style event traded 25% of max HP for a blessing pick, per one streamer) pay in blessings.
- Rerolling. Players report a reroll option that swaps the offered blessing selection for a cost; a hub upgrade expands reroll availability. Exact pricing is still to be confirmed.
Every blessing documented so far
Confirmed in the game’s own UI
These six are read directly from official blessing-selection screens:
| Blessing | Effect (as shown in-game) |
|---|---|
| Nomsa’s Fury | Every consecutive attack increases damage by 10% (up to 60% in total). |
| Fiery Meteor | Every 4.5 seconds a fiery meteor falls on the enemies! |
| Shield Recharge | Shield skill cooldowns reduced by 30%. |
| Ice Ring | Freeze duration increased from 3 to 4 sec. |
| Armor Of Thorns | Whenever an enemy damages you, you return the damage back. |
| Shield Master’s Endurance | Using a shield to block consumes 50% less stamina. |
Reported by players (launch footage)
| Blessing | Reported effect | Confidence |
|---|---|---|
| Lightning blessing | A lightning bolt strikes near you every ~4 seconds | Single video |
| Wind-burst blessing | Wind explosion every ~3.5s; crits add +25% bonus damage for a moment | Single video |
| Poison-spew blessing | Spews poison every ~4 seconds | Single video |
| Fear Scream | Dropping below 50% HP screams, stunning nearby enemies (~5s cooldown) | Multiple players |
| Execution | Enemies below ~30% HP killed from behind die instantly — one streamer confirmed on camera it only works on basic enemies, not bosses or mini-bosses | Multiple players |
| Iron Heart | +7 HP at the end of every battle | Single video |
| Storm Heart | +70 HP at the end of every battle (possibly an upgraded Iron Heart) | Single video — to be confirmed |
| Barbarian’s Blessing | +20% damage, but status application −10% | Multiple players |
| Sacrifice-style blessing | Trades ~25% max HP for a large stat boost | Single video |
| Anvil blessing | Improves blacksmith/upgrading outcomes for the run | Single video — to be confirmed |
Which blessings are worth taking?
- Nomsa’s Fury is the consensus top pick for any build that lands long strings — fast daggers, dual wield, even greatsword punish windows.
- Fiery Meteor is free damage that keeps working while you dodge; it’s the most-recommended “generic” blessing for new players.
- Fear Scream is a get-out-of-jail card on hard maps, though strong players sometimes prefer not to build around getting hit.
- Barbarian’s Blessing is a trap for status builds — the −10% application quietly bleeds your status uptime; take it on pure crit or raw-damage builds only.
A note on stacking
Blessings stack with each other and with gear lines — one streamer stacked Nomsa’s Fury with crit bonuses and meteor ticks into a screen that simply deleted mid-bosses. There’s no documented anti-synergy beyond trade-offs written on the card (like Barbarian’s), so take the ones that feed the engine you already have: see the Builds overview to name your engine first.
Keep reading
- Rogue Blight Builds: Five Archetypes and How to Choose YoursHow builds actually work in Rogue Blight — stat scaling, status engines, off-hand choices — plus our five documented builds from Strength-crit to double Flame Sword. Read guide
- Rogue Blight Fungi Guide: What Fungi Are For and How to Get ThemFungi in Rogue Blight explained — the mushroom currency's confirmed uses (blessings for 5, the Mimic Head's upkeep, selling challenge maps) and every farm source. Read guide
- Rogue Blight Map Nodes and Random Events: Every Node Type ExplainedThe eight map node types in Rogue Blight — Enemy, Unknown, Chest, Shop, Statue, Bonfire, Blacksmith, Boss — plus random events, steal chances and every NPC. Read guide
- Rogue Blight Meta Upgrades: Every Permanent Upgrade and What to Buy FirstThe full hub upgrade list in Rogue Blight — max HP, weapon slots, bonfire potion refills, gold recovery, shop stock, blacksmith points — with a buy order that works. Read guide
- Rogue Blight Status Effects: Burn, Bleed, Poison, Freeze, ShatterEvery status effect documented in Rogue Blight, how the buildup bar works, why hits while the effect is active don't stack it twice, and how to resist them. Read guide